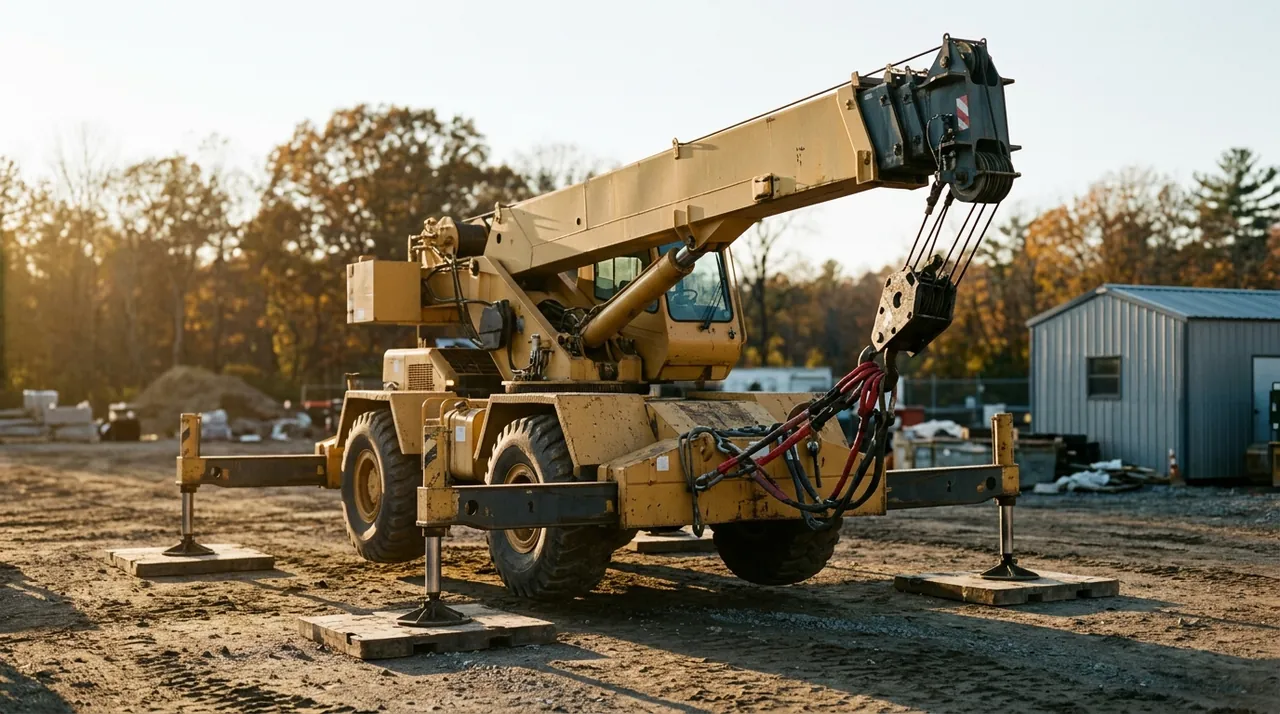
Before you consult a load chart or rig a single sling, the ground under your outriggers has to be right. A telescoping-boom crane is powerful and can become dangerous the moment the soil beneath a float yields. This lesson covers the full setup sequence — site reading, outrigger deployment, leveling, pad sizing, crane-on-rubber travel, wind and weather awareness, and the pre-swing clearance check — and explains why each step protects both the crane's rated capacity and everyone on the job site.
Reading the site before the crane arrives
Setup begins with a ground assessment, not with the outrigger pins. Walk the proposed area and ask four questions: What is the grade? What is the soil condition? Has this ground been disturbed? And what is underneath it? A visible slope tells you whether you need blocking to achieve level. Soft or wet soil, recently placed fill, and backfilled excavations are all warnings that bearing capacity may be lower than the surface suggests.
Underground hazards — utilities, voids, buried tanks, or utility corridors — can collapse under an outrigger load without warning. Confirm utility locations through Dig Safe before setup. If you have any doubt about subsurface conditions at the exact outrigger footprint, relocate the crane or get a soil evaluation. Once a float punches through, the lift is already in trouble.
Outrigger deployment and leveling
The load chart you use is tied to a specific outrigger configuration. Fully extended outriggers give the widest stance and the highest rated capacities; partially extended or on-rubber configurations have separate charts with significantly lower numbers. Those are not interchangeable. When the chart calls for fully extended outriggers, the beams must reach their rated position and be pinned where the manufacturer requires. An outrigger set at less than its rated extension voids the rated capacity you intend to use.
Once the jacks are down, level the crane using the bubble indicator before applying any load. Even a modest out-of-level condition shifts the load's moment toward the low side and reduces effective capacity. The manufacturer specifies the allowable tolerance. If the ground is not cooperating, add cribbing under the low float or choose a different location — do not lift out of level and expect the load chart to still apply.
Outrigger pads and ground bearing pressure
Every outrigger transfers the crane's weight and the load's weight down through a steel float into the soil. The smaller the contact area, the higher the pressure on the ground. Pads, timber mats, or cribbing spread that point load over a larger area so pressure stays within what the soil can support. Sizing the pad correctly requires knowing the maximum load on the critical outrigger during the worst-case lift orientation, and the allowable bearing capacity of the soil. Divide the load by the bearing capacity to get minimum pad area.
Keep outriggers well back from trench edges and open cuts. The surcharge from a float placed too close can collapse a trench wall and drop the float with it. Backfilled areas are worse than undisturbed ground because disturbed soil has lost its original structure. When uncertain about fill material, plan conservatively and use larger pads.
Crane on rubber: pick-and-carry requirements
Some lifts are performed with the crane traveling on its rubber tires rather than on extended outriggers. The crane's manufacturer publishes separate on-rubber or pick-and-carry charts for these situations, and the rated capacities are substantially lower than the fully-extended-outrigger charts. For pick-and-carry moves, keep the load as low as possible and as close to the crane as the work allows. Travel only on firm, level ground — a crowned roadway, a soft shoulder, or a cross-slope can shift the load's center of gravity and push the crane toward tip-over. Before traveling, confirm the travel path with the same care you would use choosing an outrigger location.
Wind, weather, and environmental considerations
Wind acts on the load and on the boom, adding a side force the load chart does not account for. The crane manufacturer specifies maximum wind speeds for crane operation, and those limits must be observed. Gusting is more dangerous than steady wind because it applies a sudden dynamic force. When wind is picking up, stop work before the limit is reached — conditions can deteriorate faster than a load can be set down safely. Rain and ice affect boom surfaces and rigging, reduce visibility, and can make working surfaces slippery. Cold temperatures change the properties of wire rope and synthetic slings. Assess environmental conditions before beginning setup and re-assess if conditions change during the lift.
Swing clearance, tag lines, and matching the crane to the chart
Before the first pick, walk the full arc the counterweight will travel. The tail of a telescoping-boom crane swings well outboard of the carrier — in tight sites it will strike walls, adjacent equipment, or workers standing in what looks like a clear area. Identify and mark every obstruction, then brief the ground crew on which areas are off limits during lifts.
Tag lines should be attached to the load before it leaves the ground. A tag line lets a ground worker control load orientation and prevent spin or drift without getting under the load or pulling on the rigging. Plan where tag-line handlers will stand so they stay clear of the counterweight swing path and pinch points.
Also confirm that every element of the crane's actual configuration matches the chart: counterweight installed as specified, outrigger position correct, parts of line reeved as required. A chart that shows a given capacity only delivers that capacity when the crane is set up exactly as the chart assumes. Any mismatch — a missing counterweight segment, outriggers at a partial position, or wrong reeving — means you are working with an unknown capacity. Resolve the mismatch before the lift, not after.
Key Takeaways
- •Site assessment comes first: check grade, soil condition, fill areas, and underground hazards before the outriggers touch the ground.
- •The load chart is configuration-specific — outrigger position, counterweight, and reeving must match the chart exactly or the rated capacity does not apply.
- •Level the crane within the manufacturer's tolerance before lifting; an out-of-level crane loses capacity toward the low side.
- •Size outrigger pads to keep float pressure within the soil's allowable bearing capacity, and stay well clear of trench edges and disturbed backfill.
- •On-rubber and pick-and-carry lifts require their own charts; travel only on firm, level ground with the load low and close.
- •Observe the manufacturer's wind speed limits and re-assess weather conditions throughout the operation.
- •Walk the full counterweight swing arc before the first pick, brief the ground crew on off-limits areas, and attach tag lines before the load leaves the ground.